Showing posts with label game aid. Show all posts

Sunday, September 2, 2018

My journey into 3D printing, a second time

If any of you have seen or followed my old blog, of which I rarely do anything on nowadays, back in 2014 I had a few posts of excitement over accruing a 3D printer. It was purely intended for my hobby, with the intent of mostly making terrain and some other useful things. I had some plans for some simple minis, but knew I wasn't going to get any real good detail out of it.

That experience was a disaster. I constantly tinkered on it, multiple calibrations, etc. What started at first as an exciting foray into a potentially cool venture, turned into a disappointing discouraging experience. I got maybe one decent print out of all of it and a lot of failures. With a little bit of anger, I decided to cut my losses and sell the printer a few months after I got it.

That was back in 2014, and I decided to retry it a month ago. After much research, mostly on YouTube and various other review sites I got some encouragement. I had looked into a lot of models, but finally decided on the Creality Ender 3, and the big reason was because of this video.
So I got mine, and with a little assembly, I had it running and giving me a near perfect first print. I was ecstatic. So for the last month or so I have been running this thing constantly, with little to no issues and very few failed prints. This is like a dream.

So a couple things, I did a lot of research. I watched hours of videos, mostly on using and maintaining a 3D printer. I recognize now several things I did wrong back in 2014 with that printer, and I could have probably gotten it working with what I know now. But the other big factor is it has been 4 years, and the technology only got cheaper and better. Newer printers, even the chinese ones, are much better than those old machines. And that printer back then was about $800 when I got it, and this Ender 3 cost me about $240 on Amazon.

So on to some prints, shall we?

I designed this using a simple online 3D design program called Tinkercad. I consider it the MSPaint of 3D modeling software, which is perfect for me, and it's good enough for my use. I found a rock pile file on Thingiverse.com, which is a great repository for free models for printing. Definitely a recommend resource for anyone wanting to get into 3D printing. So I found the rock pile, and using Tinkercad I cut in the recesses and added the 2 little dice trays. The big dice I can use for tracking the turn in 40k, the big bowl I mainly used for command points which I track with beads, the small dice I can use for victory points, or even tracking the turns in AoS. Whatever, I want really. It's a useful command tray for holding whatever I need in games. And it fits in my game tools bag, along with the dice, tape measure, etc.
Here it is painted up. I tried to go for a similar paint style that GW uses on their Warscryer Citadel, I really like that Azyrite meteor look, but after it was all done, it just looks like a stained wood, which works good too. I finished it off with a couple coats of a spray on gloss coat to give it some toughness.

I recently got the Castle Panic board game from a friend. Wonderful game, a great time for any boardgamer. Then I thought I would add some 3D printing flair to it:
I went ahead and printed a wizard tower for use as I plan on picking that expansion up anyway.

Now that is not all I have been printing. I also printed a couple toys for my girls, some parts for the printer itself, and Jarom had me commission him some preliminary parts for some projects he has planned. I have a couple more posts coming with cool stuff I have made.

Thursday, October 5, 2017

Realms of Glory Campaign - Alpha

Here is an alpha build of a campaign system I wrote for Age of Sigmar. My brother and I are planning on doing a short narrative campaign. So I mocked this up last night and today.


It is a short campaign system (4 games long) that uses the General's Handbook matched play rules, Open War cards to set up the campaign tree, and Path to Glory for the rewards tables to progress the story of your army.

Basically it started when I saw the Open War cards used to make a tree campaign from the General's Handbook. After picking them up at the Harvester of Souls, my brother and I played 2 games with them. The games were really good fun. They can be easily used with matched play rules and create some interesting scenarios.

We got excited to try the tree campaign idea, but with some added bonuses. Bring on the Path to Glory campaign book. I will be honest I never tried Path to Glory, nor do I ever want to. The biggest problem with campaigning I found is an effect called snowballing. It is where one player gains an early boost from luck or playing well, and the advantage helps to compound as the game goes along, creating a clear winner early that becomes harder and harder to stop. Hence snowballing. Path to Glory is very guilty of this. There are ways to curb snowballing I have found, and one of them is a points limit on all games.

Anyway, never wanting to try Path to Glory, I do like the Rewards tables because they are useful and flavorful for upgrades and things like XP rewards you may find in other games.

So we got 3 parts culminating into Realms of Glory: Path to Glory rewards tables, Open War cards for a campaign Tree, and the General's Handbook for matched play rules. We are excited to try this out, then I will likely come back and edit the document until I get some semblance of readability.

Let me know what you guys think!

Sunday, August 6, 2017

Song of the Deep Empire - Encroaching Waters

I have been doing some preliminary writing for a set of scenarios and campaign for Song of Blades and Heroes. The idea is about an ancient evil from the deeps of the oceans rise up to flood the surface, destroy civilization, and recede again. The mortal races of the surface are tenacious, and always rebuild. Prompting this to happen every thousand years or so.

It is a campaign, minimum 2 players, and each player builds a warband that grows as the campaign goes along. But one player takes the role of the Deep Empire, trying to ensure the Rise happens. Other players make groups of adventurers (trying to stop it), treasure hunters (the Deep Empire is ancient, and bring a lot of relics of the past with them), or mercenaries, among other ideas. It's really up to the players how they would involve themselves in this.

I am still working out the campaign paths, scenarios, and story, but I have one idea I really do like that gives the Deep Empire an edge over the other warbands.

Encroaching Waters
All models in a Deep Empire force has the Aquatic special rule and have to pay for it, no exceptions. While this can make Deep Empire models a little more expensive, it works out because every time a Deep Empire Personality activates, water features begin to appear and spread across the game board. These water features generally may be about 3" to 4" square, and of course they will have no effect on Deep Empire models, but for the surface dwellers, it can be quite a drawback to have to move and fight through them.

So let's make some encroaching water tiles for use during a game.
I started with a display pocket. These are thick flexible pieces of clear plastic used to mount signs. So one of these provides 2 sheets when you cut off the edges.
Next I taped one of the sheets to a wooden board to hold the sheet tight. I also put a paper underneath with the basic 3"x4" squares drawn so all my water pieces are sorta around the same size.
Using my trusty hot glue gun, I write out the outlines of some water pieces.
Then I continue to work on filling the pools in with hot glue, doing an inner boarder on one, then moving on to the next while it sets, and so on.
Continue until all pieces are filled in completely.
Once the sheet has cooled, cut them out with a decent pair of scissors.
I think they work well enough to convey shallow waters. They are small enough to fit in or around most pieces of terrain. Usually water features are more elaborate, but these are designed to be put down during gameplay.
I first tried making them and painting them blue, but I decided they looked too fake and stood out too much. I realized the clear option was better so you could see the colors underneath and they would blend in with the map better. Besides, shallow waters are not blue.

As you could also see I have a selection of aquatic themed BONES minis for this project. That was intentional. I will do infrequent updates as this project comes along. Maybe even a battle report!

Thursday, August 3, 2017

Infinity Scenery - Weighted and Mounted

Previously I had done a little tip on how to weigh down the paper Infinity terrain sets. Those are working great, but there is the matter of the mat itself, which is just folded paper. When unfolding it, it jostles and has unsightly creases that raise up.

Luckily I found this extremely useful YouTube video:

Just follow his instructions, I did. These are the results:
We had bought 2 of the mats so they could stick together and make a bigger board. These are done single fold instead of tri-fold as shown in the video. I didn't plan on storing these in any boxes or anything.
This is just one of the boards. It lays very flat and solid on the ground. Much better than just letting the folded paper rest.
This is the 2 together. It makes an area about 3'x4'. If I make 2 more of them, I can get an actual 6'x4' board! But that's for a later project.
Here it is with the weighted terrain pieces. Again, this is 2 sets. A pretty good spread for some scifi skirmish gaming.

Friday, July 28, 2017

Treating Reaper BONES minis

If you have been following me for a while, you would know I actually really like Reaper's BONES line of minis. They are cheap, there's a huge variety, and have a decent amount of detail, but there are problems with them, namely the soft plastic they are made of. But I don't fret over that as with a little creative hobbying, you can get around the flaws. So here are some tips I have found for preparing BONES minis for tabletop.

TIP 1) Replace Bendy Bits
 A common complain are the bendy and warped weapons. Some guides will tell you to stick them in hot water, bend it back, and let it cool. But for me, don't be afraid to replace them with whatever bits you got. Superglue works best for this as plastic glues don't work on BONES materials.
In this case I simply chopped off the spear bits, drilled holes in the hands, and fed in this bit from the Drukhari Venom kit. Common fantasy orcs are different than the 40k Orks are some of us used to. A spear with skulls on it seemed to fit.
 
TIP 2) Base them on Washers
BONES minis are made of a very light weight material, and have little bases built into them already, but they are rarely big enough and for especially tall minis they are prone to tipping. So put them on something cheap and weighty. Put them on washers.
I got these at a local Home Depot. When looking for good washers, you want ones with the right size on the outside and as small a hole inside as possible. The washers also don't need to be especially thick. I got these ones because I can use them for 25mm, 32mm, and 40mm bases respectively.
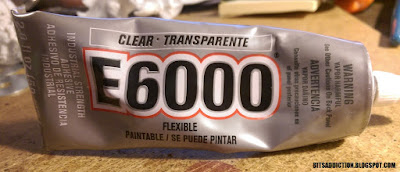
For gluing them on, I would recommend E6000 or GOOP. You can get either at any hobby story and they are essentially the same things. They are very strong but have a long set time and cant do detail gluing very well. But it is great for gluing BONES to washers. Hot glue isn't strong enough and doesnt glue to metal very well, and superglue is too brittle. E6000 does great with metal.
This gives us a decent amount of weight on the bases and holds them upright fairly well for cheap. Again, E6000 works great on metal, so even one of my old Reaper metal minis has a nice stable base now. But what about the leaning model syndrome?

TIP 3) Prop them up with Paperclips
Some models have weak ankles. Literally. They lean forward too far or back too far. Again others will tell you just to put them in hot water then correct them, but I found the strongest solution is to use the same stuff I pin models with. Paperclips.
When painted up in a flat black, the pins should be fairly invisible.

TIP 4) Transport them on Magnets
With metal washer bases and light plastic minis, they have a very good advantage with magnets and transportation. I found a cheap plastic container with lid at my Walmart. I wanted something about 3" deep, so it could hold my bigger bones minis.
Next I got this magnetic tape. I hear you can buy sheets of this stuff instead of the tape, which may have been better. Crafters usually use this to make refrigerator magnets.
Line the bottom of the container with the magnetic tape. I found the sticky material on the back of the stuff to be incredibly weak, so I just glued the strips down with the ultra strong E6000.
And now you have a decently stable carrying case for your minis without having to bother with foam trays or liners. Granted the magnets are not strong enough to hold the minis when they are really shooken around or bumped upside down, but for normal jostling and transportation, it's definitely good enough.

Monday, June 5, 2017

Drukhari - Combat Drug Tokens

I have always had some plans to expand my current Dark Eldar force with some more traditional (not rats at least) Dark Eldar. I have some plans for them and more on that later. With everything we have been seeing about 8th edition 40k, I am getting more excited than ever to get back into the grimdark future. One thing is Dark Eldar (I like the new name, Drukhari) seem to have gotten a boost. It's a combination of changes to their army and just the new edition being much more friendly to their play style.
So I whipped these up in a night. It was nice because I didn't need to prime them, and I wanted to get started painting something simple before I moved onto bigger projects. These are combat drug tokens. The units with the combat drugs rules get to choose which drug they are taking at the start of the battle, but each one has to be different per unit. So making 6 tokens to remind myself which unit has which drugs seemed like a fun little project. I could just write the benefit (like +1s, +1a, +1ws, etc) on a scrap of paper to follow the units around, but I sort of fell in love with doing little hand painted things after making my display board plaque.

Following a similar process, here is how I made them. This would be good for just about any hand painted tokens you want to put on the battlefield.
First thing is I found the little symbols I need and printed them out on sticker label paper. Then I cut them out and stuck them on 32mm bases. The symbols I got from game-icons.net, which is an excellent source for this stuff. Check it out. The only one I didn't get from there is the Dark Eldar helmet, which I just got from Google images. I stuck them down on my surface using blue tack.
Next it's just as easy as painting the base colors inside/outside the lines. Trying to leave most of the black lines from the print in place. Here is also where I experimented on the colors I would use. Originally the lotus flower to the right I started painting in blue, but then I realized the drug was called Grave Lotus, so I opted for black instead.
This step is kind of subtle, but I went around the symbols with a lighter color, painting in a sort of splotchy pattern to highlight them over the background darker color.
Next I wanted the tokens to have a cool border because I knew I wasn't going to be able to paint a perfectly round border where it meets the black of the base. So I just did a black splotchy pattern around it to contain the symbols and colors.
I really like the black lines, so to preserve them I went back over the lines with a fine tip artist pen to redefine them.
Next I went with the lighter corresponding colors inside the symbols and painted them within their base colors so some of that is still showing through the edges. This brings them out against the background.
Finally I touched up with some final details and I am done! This is always a fun little project because it's easier than painting miniatures and you get more freedom with it. I would recommend doing something like it.

Now, can you guess which token represents which drug?

Monday, April 3, 2017

Hobby Tip - Infinity Scenery Packs


My brother and I wanted to get some more sci-fi terrain, so we saw these Infinity Scenery Packs. They are a very good price, and come with some decent amount of terrain. Not enough to cover a 4'x6', but good enough for small skirmishes.

They are pretty easy to assemble, but once we got it done we noticed something. They are made out of printed cardstock, and are very light weight. The issue is they easily get bumped around the table, and even if someone were to open a window in the house, your terrain not weighed down with lots of minis would get moved about.

So we came up with a couple of ideas to weight them down.
The building layers were easy. We got some cheap paint stirring sticks from the hardware store. Cut them down to fit the insides, and hotglued them to all 4 inside walls. It sufficiently weighed them down without getting too heavy. I would recommend hotglue over woodglue, because water based glues may soak into the cardstock and cause rippling and warping. Hotglue seemed to do the trick just fine.

The small crates were a different issue. I wanted them to be able to stand up on end, as well as lay flat. So I came up with the idea of weighing them down with wood cubes. I bought a piece of 1.5"x1.5" lumber. A long wood strip. Then we cut off pieces 1.5" long. This created a nice cube, which fit perfectly into the crates.
Now, now matter which side you lay the crate on, it gets some stability. Especially if you decide to put them up on end, the block rests at the bottom and makes it bottom heavy. No need for gluing.

We like this kit because it looks great, is cheap, and sufficient for quick terrain. We will be experimenting with the other scenery packs and try to get enough for some good tables, and see how we can weigh them down as well.

Tuesday, January 17, 2017

LVO Army Transportation

I have to take my army on a plane. And there is no way I am checking that piece of luggage! So I found for cheap a piece of carry-on luggage, with the sole purpose of being my army carrier.
With some cardboard cutting and hotglue-ing, I have made a couple sectioned model trays. I may line some of them with some thin foam material for extra safety, but this should ensure my models fit securely in the overhead compartment! Hopefully.
Only 2 trays deep. The Prosecutors are turning out to be very problematic for space, but definitely more manageable with the wings conversion I did to them.

Wednesday, October 19, 2016

Silver Tower - New mini standees

In playing Warhammer Quest: Silver Tower, we found the stand-in miniatures to be a little immersion-breaking. Still too cheap to buy the real ones, I came up with an alternative.
Now paper miniatures is nothing new, but I just thought I'd give it a shot and like what they turned out to be. I think these will help with the confusion of what was what as the bases are clearly labeled what each standee reperesents and their wargear. I even made sure that the pictures in them represented their weapons. The pictures are all recognizable as I ripped them from GW's pictures of the models.

Thursday, April 14, 2016

Deadzone - Game Board, Terrain, and Game Aid

My brother is coming over this weekend to try a game of Deadzone together. The game utilizes a 3"x3"x3" cube grid system which allows for ease and quick gameplay, as well as VERY dense terrain. Nothing I had already really fit the bill. Fortunately Mantic makes their Battlezones terrain system designed specifically for this, and it looks excellent. Unfortunately I do not have any, yet. So for this demo game, I figured I would make it all myself.
Typical Deadzone terrain density.
It was all fairly easy since the whole system works on that 3" cube measurements, so I took a sheet of foam core, cut it in 3" squares (or groups of 3" squares for stability) and began constructing. When you google 'battlezones terrain' you find plenty of inspiration for what to build.
All made over the course of a couple afternoons.
Then the game mat itself is 2'x2', with the 3" grid on it, as per a standard game for Deadzone. Unfortunately I didn't have a nice print mat that I wanted to draw the 3" grid on with sharpies, so I am using a cut of 1" gridded paper.
In the galactic spanse, Elmer's Corp is one of the major contributors of prefab buildings for new colonies. This was all made with Elmer's Wood Glue as well. I'm sensing a theme here.
A quick note on foam core (also known as foam board). It's a great construction material, but there are 2 types generally on the market. You may be tempted to get the cheap dollar store stuff, but DON'T. You get what you pay for. It is so cheap and fragile. The foam in the middle is that light pearly foam that makes a big mess when you cut it, and the paper sandwiching it is really just paper. Unlike Elmer's brand, for example, uses a sturdier foam and sandwiched with harder cardstock. It's a little more expensive (not by much) but totally worth it.
Open these in a new window and save them for better resolution.
Also on the subject of Deadzone, I made some blank stat cards for your minis. The fields in them are designed for regular games and campaign play. When printed and cut out, each card measures about 5"x3.5"
This is another useful sheet for command dice. When the game gets released, they will provide printed command dice, but in the meantime I made a quick reference card for when rolling your command dice. This works nice because as you roll the dice, you can set them on the proper field for ease. The Special area is intentionally left blank so you can write in your team leader's unique ability.