These plastic paint palletes are generally very cheap and easy to get to, but if you want a quick way to just free up some white space on them, here is an overnight tip for easily cleaning it off.
I discovered this one day when I needed to apply some glue to something with a brush, and I used my palette. First liberally apply a bunch of white glue/PVA/school glue/Elmer's Glue allover the areas you want to clean some of the paint off of.
Make sure it spreads around some and covers the main areas well enough. You want the glue thick, but not too thick. Being able to slightly see the colors through is idea. Let this dry overnight. This is a great thing to do before you go to bed.
By the next morning, all you need to do is peel off the glue layers, which will pull up most of the paint with it.
These are all the glue peels showing how much paint they took with them.
Showing posts with label tip. Show all posts
Saturday, September 2, 2017
Monday, July 31, 2017
A Better Small Flying Base
This is a common sight for my Tau at least, and it pisses me off how much it happens. All it takes for one to drop a mere 3' from the table, and the shattering happens. Having clear acrylic bases to be invisible on the board is nice, but not worth all this trouble. So I have found a better solution.
GW's 32mm plastic bases are the same diameter as the small flying base! This is important because of the following steps:
Start by taking a large paper clip and straightening it out. Then using some pliers, form a little shape like this. Find a drill bit with about the same size as the paperclip, then drill a hole directly in the center of the 32mm base.
The shape you made in the paperclip is to provide strength for it to glue into the inside of the base. I used some superglue for quick place. Superglue is not strong enough in this case, but it works for holding it there.
Next I filled in the whole bottom of the base with hot glue. This did 2 things: hold the paperclip in place even better provided some really good weight to the base. Flying models can tend to be top heavy and prone to tipping over. This will counter some of that.
Once the hot glue cools and sets, you should have penty of wire for mounting. You merely need only to cut it short to the height you need, and drill into the bottom of the model and glue the wire in it with superglue.
I am eventually going to do this to all my drones. Even my planned Drukhari will have some Hellions in which I am basing them this same method. In case any of you are wondering about the strength of this, I have had models based this way fall from the table several times, and the bits of the model break before the basing does. I'll take it!
GW's 32mm plastic bases are the same diameter as the small flying base! This is important because of the following steps:
Start by taking a large paper clip and straightening it out. Then using some pliers, form a little shape like this. Find a drill bit with about the same size as the paperclip, then drill a hole directly in the center of the 32mm base.
The shape you made in the paperclip is to provide strength for it to glue into the inside of the base. I used some superglue for quick place. Superglue is not strong enough in this case, but it works for holding it there.
Next I filled in the whole bottom of the base with hot glue. This did 2 things: hold the paperclip in place even better provided some really good weight to the base. Flying models can tend to be top heavy and prone to tipping over. This will counter some of that.
Once the hot glue cools and sets, you should have penty of wire for mounting. You merely need only to cut it short to the height you need, and drill into the bottom of the model and glue the wire in it with superglue.
I am eventually going to do this to all my drones. Even my planned Drukhari will have some Hellions in which I am basing them this same method. In case any of you are wondering about the strength of this, I have had models based this way fall from the table several times, and the bits of the model break before the basing does. I'll take it!
Friday, July 28, 2017
Treating Reaper BONES minis
If you have been following me for a while, you would know I actually really like Reaper's BONES line of minis. They are cheap, there's a huge variety, and have a decent amount of detail, but there are problems with them, namely the soft plastic they are made of. But I don't fret over that as with a little creative hobbying, you can get around the flaws. So here are some tips I have found for preparing BONES minis for tabletop.
TIP 1) Replace Bendy Bits
A common complain are the bendy and warped weapons. Some guides will tell you to stick them in hot water, bend it back, and let it cool. But for me, don't be afraid to replace them with whatever bits you got. Superglue works best for this as plastic glues don't work on BONES materials.
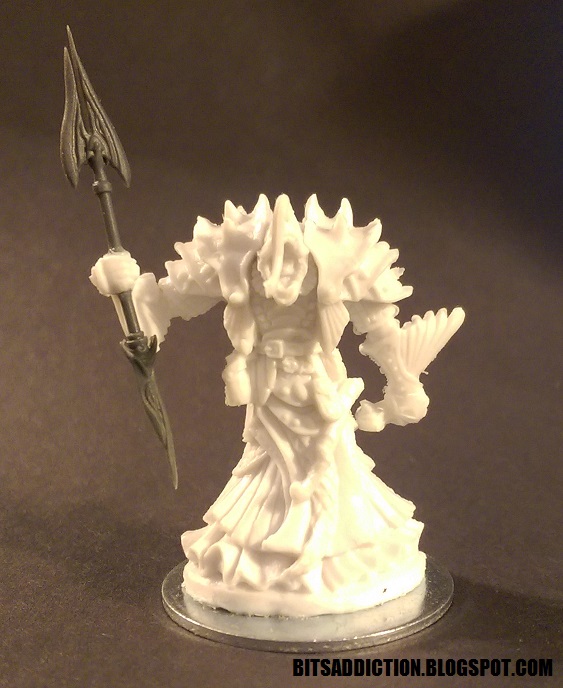
In this case I simply chopped off the spear bits, drilled holes in the hands, and fed in this bit from the Drukhari Venom kit. Common fantasy orcs are different than the 40k Orks are some of us used to. A spear with skulls on it seemed to fit.
TIP 2) Base them on Washers
BONES minis are made of a very light weight material, and have little bases built into them already, but they are rarely big enough and for especially tall minis they are prone to tipping. So put them on something cheap and weighty. Put them on washers.
I got these at a local Home Depot. When looking for good washers, you want ones with the right size on the outside and as small a hole inside as possible. The washers also don't need to be especially thick. I got these ones because I can use them for 25mm, 32mm, and 40mm bases respectively.
For gluing them on, I would recommend E6000 or GOOP. You can get either at any hobby story and they are essentially the same things. They are very strong but have a long set time and cant do detail gluing very well. But it is great for gluing BONES to washers. Hot glue isn't strong enough and doesnt glue to metal very well, and superglue is too brittle. E6000 does great with metal.
This gives us a decent amount of weight on the bases and holds them upright fairly well for cheap. Again, E6000 works great on metal, so even one of my old Reaper metal minis has a nice stable base now. But what about the leaning model syndrome?
TIP 3) Prop them up with Paperclips
Some models have weak ankles. Literally. They lean forward too far or back too far. Again others will tell you just to put them in hot water then correct them, but I found the strongest solution is to use the same stuff I pin models with. Paperclips.
When painted up in a flat black, the pins should be fairly invisible.
TIP 4) Transport them on Magnets
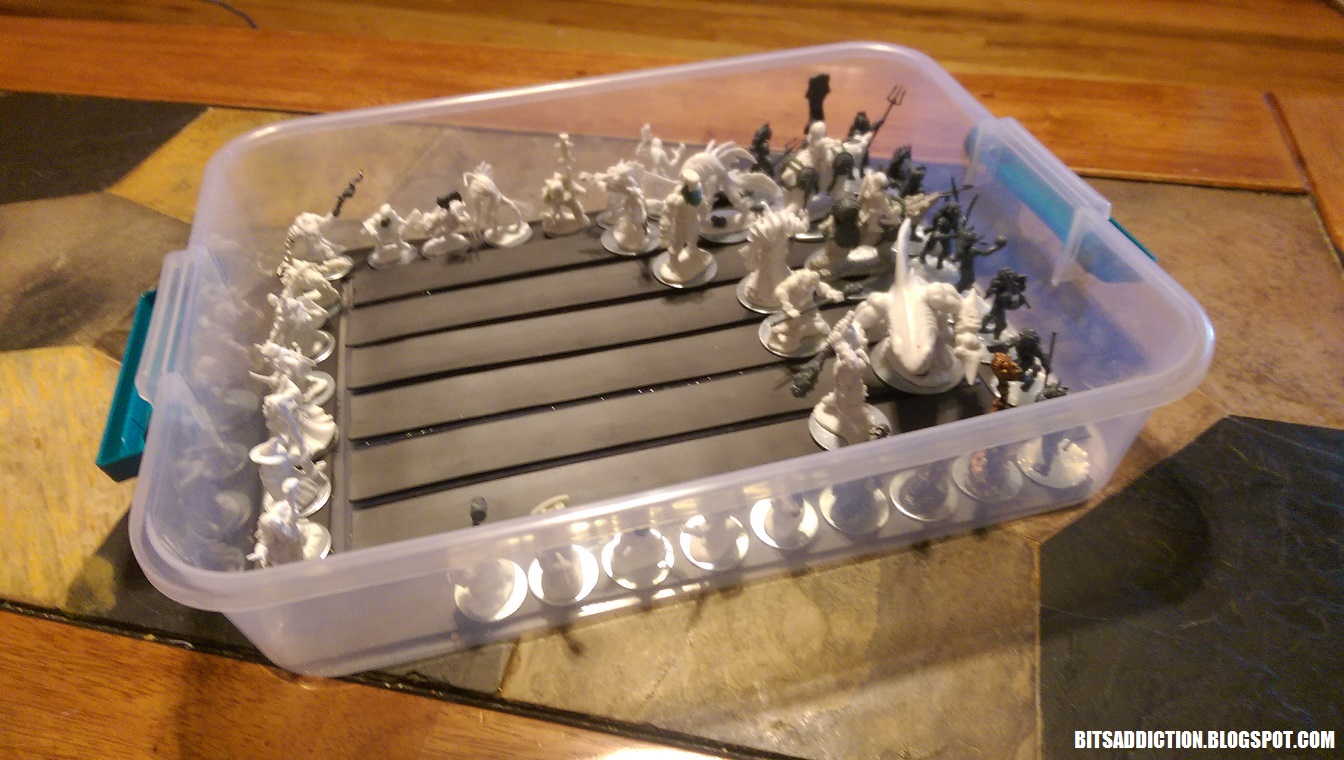
With metal washer bases and light plastic minis, they have a very good advantage with magnets and transportation. I found a cheap plastic container with lid at my Walmart. I wanted something about 3" deep, so it could hold my bigger bones minis.
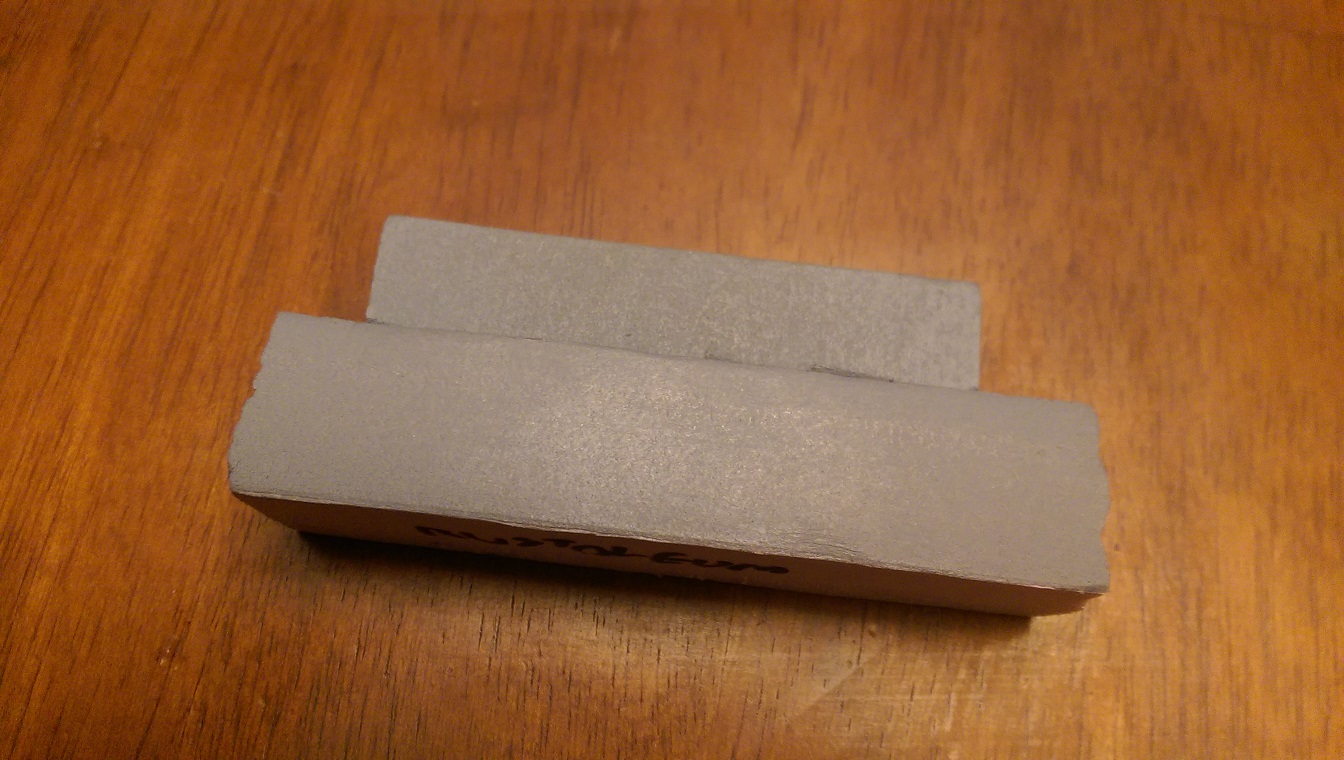
Next I got this magnetic tape. I hear you can buy sheets of this stuff instead of the tape, which may have been better. Crafters usually use this to make refrigerator magnets.
Line the bottom of the container with the magnetic tape. I found the sticky material on the back of the stuff to be incredibly weak, so I just glued the strips down with the ultra strong E6000.
And now you have a decently stable carrying case for your minis without having to bother with foam trays or liners. Granted the magnets are not strong enough to hold the minis when they are really shooken around or bumped upside down, but for normal jostling and transportation, it's definitely good enough.
TIP 1) Replace Bendy Bits
A common complain are the bendy and warped weapons. Some guides will tell you to stick them in hot water, bend it back, and let it cool. But for me, don't be afraid to replace them with whatever bits you got. Superglue works best for this as plastic glues don't work on BONES materials.
In this case I simply chopped off the spear bits, drilled holes in the hands, and fed in this bit from the Drukhari Venom kit. Common fantasy orcs are different than the 40k Orks are some of us used to. A spear with skulls on it seemed to fit.
TIP 2) Base them on Washers
BONES minis are made of a very light weight material, and have little bases built into them already, but they are rarely big enough and for especially tall minis they are prone to tipping. So put them on something cheap and weighty. Put them on washers.
I got these at a local Home Depot. When looking for good washers, you want ones with the right size on the outside and as small a hole inside as possible. The washers also don't need to be especially thick. I got these ones because I can use them for 25mm, 32mm, and 40mm bases respectively.
For gluing them on, I would recommend E6000 or GOOP. You can get either at any hobby story and they are essentially the same things. They are very strong but have a long set time and cant do detail gluing very well. But it is great for gluing BONES to washers. Hot glue isn't strong enough and doesnt glue to metal very well, and superglue is too brittle. E6000 does great with metal.
This gives us a decent amount of weight on the bases and holds them upright fairly well for cheap. Again, E6000 works great on metal, so even one of my old Reaper metal minis has a nice stable base now. But what about the leaning model syndrome?
TIP 3) Prop them up with Paperclips
Some models have weak ankles. Literally. They lean forward too far or back too far. Again others will tell you just to put them in hot water then correct them, but I found the strongest solution is to use the same stuff I pin models with. Paperclips.
When painted up in a flat black, the pins should be fairly invisible.
TIP 4) Transport them on Magnets
With metal washer bases and light plastic minis, they have a very good advantage with magnets and transportation. I found a cheap plastic container with lid at my Walmart. I wanted something about 3" deep, so it could hold my bigger bones minis.
Next I got this magnetic tape. I hear you can buy sheets of this stuff instead of the tape, which may have been better. Crafters usually use this to make refrigerator magnets.
Line the bottom of the container with the magnetic tape. I found the sticky material on the back of the stuff to be incredibly weak, so I just glued the strips down with the ultra strong E6000.
And now you have a decently stable carrying case for your minis without having to bother with foam trays or liners. Granted the magnets are not strong enough to hold the minis when they are really shooken around or bumped upside down, but for normal jostling and transportation, it's definitely good enough.
Thursday, April 27, 2017
City Ruins Terrain
![]() |
| Next on the strips, you mark out 1" marks and cut them on those marks. This should create your little bricks. You will need a lot of them. |
![]() |
| Now we have all our little bricks done, you essentially have a bucket of Lego that you can use to build your structures. |
![]() |
| Last step before painting is gluing down sand. I did some on top of the bricks as well. |
| |||
| And lastly you paint and decorate. |
For painting I just used cheap craft paints.
- For the ground I base coated it with a medium gray, washed with black, and drybrushed in a forest green in a blotchy pattern.
- For the stones and walls I based them with a dark grey and washed with black. Then I sponged a medium gray allover the bricks for texture. Finally I drybrushed a light gray especially around the edges.
- The wooden floors were based with a chocolate brown, washed with black, then drybrushed with a light brown (almost tan).
- Next I did some creeping vines using a very similar technique shown here (scroll down to Finishing Touches).
- Once the vines are dry, I gave everything a coat of Mod Podge. After the Mod Podge dries, it had a slightly satin or glossy sheen, so I did a final coat of a spray on matte varnish.
- Final step is hotglue on some cheap aquarium plants to create colorful vegetation.
Monday, April 3, 2017
Hobby Tip - Infinity Scenery Packs
My brother and I wanted to get some more sci-fi terrain, so we saw these Infinity Scenery Packs. They are a very good price, and come with some decent amount of terrain. Not enough to cover a 4'x6', but good enough for small skirmishes.
They are pretty easy to assemble, but once we got it done we noticed something. They are made out of printed cardstock, and are very light weight. The issue is they easily get bumped around the table, and even if someone were to open a window in the house, your terrain not weighed down with lots of minis would get moved about.
So we came up with a couple of ideas to weight them down.
The building layers were easy. We got some cheap paint stirring sticks from the hardware store. Cut them down to fit the insides, and hotglued them to all 4 inside walls. It sufficiently weighed them down without getting too heavy. I would recommend hotglue over woodglue, because water based glues may soak into the cardstock and cause rippling and warping. Hotglue seemed to do the trick just fine.
The small crates were a different issue. I wanted them to be able to stand up on end, as well as lay flat. So I came up with the idea of weighing them down with wood cubes. I bought a piece of 1.5"x1.5" lumber. A long wood strip. Then we cut off pieces 1.5" long. This created a nice cube, which fit perfectly into the crates.
Now, now matter which side you lay the crate on, it gets some stability. Especially if you decide to put them up on end, the block rests at the bottom and makes it bottom heavy. No need for gluing.
We like this kit because it looks great, is cheap, and sufficient for quick terrain. We will be experimenting with the other scenery packs and try to get enough for some good tables, and see how we can weigh them down as well.
Tuesday, January 17, 2017
LVO Army Transportation
I have to take my army on a plane. And there is no way I am checking that piece of luggage! So I found for cheap a piece of carry-on luggage, with the sole purpose of being my army carrier.
With some cardboard cutting and hotglue-ing, I have made a couple sectioned model trays. I may line some of them with some thin foam material for extra safety, but this should ensure my models fit securely in the overhead compartment! Hopefully.
Only 2 trays deep. The Prosecutors are turning out to be very problematic for space, but definitely more manageable with the wings conversion I did to them.
With some cardboard cutting and hotglue-ing, I have made a couple sectioned model trays. I may line some of them with some thin foam material for extra safety, but this should ensure my models fit securely in the overhead compartment! Hopefully.
Only 2 trays deep. The Prosecutors are turning out to be very problematic for space, but definitely more manageable with the wings conversion I did to them.
Wednesday, October 19, 2016
Silver Tower - New mini standees
In playing Warhammer Quest: Silver Tower, we found the stand-in miniatures to be a little immersion-breaking. Still too cheap to buy the real ones, I came up with an alternative.
Now paper miniatures is nothing new, but I just thought I'd give it a shot and like what they turned out to be. I think these will help with the confusion of what was what as the bases are clearly labeled what each standee reperesents and their wargear. I even made sure that the pictures in them represented their weapons. The pictures are all recognizable as I ripped them from GW's pictures of the models.
Thursday, July 14, 2016
Quick Tip - Cupcake Trays
Just a little hobby tip I thought I'd share. I love this.
I usually plan out my conversions and building units of models ahead of time, this means arranging all the bits and ensure there are no doubles in pairings of similar bits to each other to help ensure each model in a unit is uniquely posed in some way.
I used to lay the bits out on a table, but it took up too much space and was prone to getting knocked around or bits rolling into other piles.
So I use a cupcake tray. It keeps the bits separated and I can arrange them at ease. Whenever I build a unit, I will always use this first. Also as I am gluing models, I use the assembly line method just like with painting. I will go through each mini and glue the legs to torsos, then once I get through them all the paint should be dry for me to do all the heads, etc.
I usually plan out my conversions and building units of models ahead of time, this means arranging all the bits and ensure there are no doubles in pairings of similar bits to each other to help ensure each model in a unit is uniquely posed in some way.
I used to lay the bits out on a table, but it took up too much space and was prone to getting knocked around or bits rolling into other piles.
![]() |
| This was me planning out the bits for one of my units of Wracks. |
Wednesday, March 9, 2016
The Holy Grail of Terrain Building!
I have found the best spray paint for terrain builders. It's affordable (About $5 a can), it does a nice even coat, and best of all:
It ate right through the acrylic coat and into the foam. I figured I would need to do a couple more coats of the craft acrylics and test again, but I was running low on spray paint anyway. So I got into home depot and found the Rustoleum, thought I'd give it a try. Then I did the same test again, and got this:
This one looked much better. Then I noticed that it wasn't eating through the places where I didn't get the acrylic undercoat. So I got 2 pieces of foam (one pink and one blue) without paint on them and tried the spray:
I could not believe it. This is the stuff I have wanted all along. This makes my job so much easier. I was worried that I would need to paint in all the nooks and crannies of the tiles to get the foam, potentially covering up some of the details of the plaster bits with the thick acrylics. Now I don't need to. I took that can and sprayed about 5 tiles before it ran out.
They look so much better even just primed. Naturally I bought 5 more cans of this stuff then next time I found myself in Home Depot.
IT DOES NOT MELT FOAM!
I couldn't believe it either. Rustoleum Flat Primer is what I have been searching for. I stumbled on the discovery when I was testing spray on primers for my Zone Mortalis tiles. They have foam parts, and I worried about the spray paint eating into them, and weakening my whole project. So I ran a few tests. I got a couple brands of craft acrylics and painted a coat on some pieces of foam, and used a spray paint I already had, Krylon brand, and this is what I got:It ate right through the acrylic coat and into the foam. I figured I would need to do a couple more coats of the craft acrylics and test again, but I was running low on spray paint anyway. So I got into home depot and found the Rustoleum, thought I'd give it a try. Then I did the same test again, and got this:
This one looked much better. Then I noticed that it wasn't eating through the places where I didn't get the acrylic undercoat. So I got 2 pieces of foam (one pink and one blue) without paint on them and tried the spray:
I could not believe it. This is the stuff I have wanted all along. This makes my job so much easier. I was worried that I would need to paint in all the nooks and crannies of the tiles to get the foam, potentially covering up some of the details of the plaster bits with the thick acrylics. Now I don't need to. I took that can and sprayed about 5 tiles before it ran out.
They look so much better even just primed. Naturally I bought 5 more cans of this stuff then next time I found myself in Home Depot.
Subscribe to:
Posts (Atom)