Tuesday, May 31, 2016

The Coven of Verminlord Skrax - Painted Models Part 3

I got my grotesques done. All 9 of them on 40mm bases.


Just imagine these 9 monstrous rats dropping in right behind your battle line.

Saturday, May 28, 2016

Deadzone - Item Counters

When I put in my original pledge to the Deadzone Infestation kickstarter, I went ahead and added one of these as an extra.
These are for Dreadball Xtreme, but I saw a lot of potentially useful bits for terrain or whatever. When I got to them, all the small crates had little lids on them, with symbols underneath. I gathered they were some sort of scoring system for Dreadbal Xtreme, so I had an idea. With Deadzone 2.0 there are 16 item counters. On one side is a standard crate symbol, and on the other is one of the random items you are supposed to be able to pick up in game. There are 16 of those little crates with lids in that Xtreme Scenery pack.
Lids on
Lids off
So I took the old Dremel tool, ground out the original symbols under the lids, made little item tokens on my computer, printed them onto label paper, cut them out, and stuck them inside the lids. Perfect for a more scenic random items option.

Wednesday, May 25, 2016

Gorkamorka - Mutiez WIP

Now for my second mob for Gorkamorka, the Mutiez:

GOGMAGOG'S QUESTING KNIGHTS

Left to rightL Seeker Gogmagog and the Keeper
Lead by Seeker Gogmagog of Magod. The mutiez are mutant humans stranded on this world, forced to live amongst their irradiated damaged ship, and survive against the Orks and other dangers of the world. Despite all being horribly mutated, they are deeply religious, always seek knowledge and technology, and always mounted. They have no vehicles only their mutated mounts. All the mounts here are made from Slaanesh Seekers bits, and the riders are made from various bits from allover. Some random ones from my bits collection, some Bretonians, some Skitarii, etc. Mutiez have the most powerful and advanced weaponry in the game, so each model is very espensive.
Two more mutiez are the Snaggaz. Thinner and quicker mutiez with a higher ballistics skill. These guys each have a gun. The Questing Knights always wear their knightly helmets because they are ashamed of their horrible visages. You can see all the random mutations on these guys.
Last are the Unks, which are heavier set and stronger mutiez. These guys primarily will have the melee weapons. The green one has his limbs made with greenstuff. He's a tentacle mutant.

Sunday, May 22, 2016

Deadzone - Enforcers, Rebs, and Plague Oh my!

I am pretty sure this is going to be the last new miniatures I am buying for Deadzone for a while.
First off I bought off of Ebay a Pathfinder expansion set. They are the scouts of the Enforcers. One of the models comes with this neat little monowheel scout bike. In the new rules, this bike is treated as an item that you can equip on just about any model, no restrictions. So as far as I can tell this model usually comes with a Pathfinder riding it, but it doesn't need to be that way. I put one of my Assault Enforcers on it, with the plans of having a melee guy zip up and punch something in the opponent's force. So as far as I can tell this conversion is legal, unless they FAQ it or something.
With that conversion I am left with 2 Pathfinders on foot (the one on the right was mounted on the bike, but I have her propped up on some debris).

Then I started looking through that big lot of Reaper Bones I got a while back, and realized I had some good minis to represent Rebs. I didn't know what game I would use these for, and this turned out to be perfect.
According to Reaper, these are the Nova Corp, but in Deadzone they will be Rebel Troopers. Cheap human models with rifles. They can be the backbone of my Human-centric strike force.
To Reaper these are IMEF troopers, and in Deadzone they will be my Rebel Grogan. While in the setting, Grogan are an alien race, a little more monstrous and tougher than humans, that will be represented by their heavier armour. The guy on the far left will be equipped with the Onsought Cannon, and the rest just have rifles.
Then some of my other Chronoscope minis will be the other parts of my Rebs. The far left is a Rebel Commander with Blaster, then a Rebel Commander with Rifle, then a Rebel Specialist with Sniper Rifle, and the big ape dude will count as the Rebel Teraton. The nice thing about all these is they already have textured bases which I think fit pretty close with the rest of my Deadzone minis. So no need to rebase them.

With the power of Ebay, I was able to score my next, and LAST, faction starter for Deadzone. The Plague.
Not much of a conversion effort going on here. Just my leader Stage 1A in the front and some leaping Stage 2A's in the back. With my plague force basings, I cut back on the concrete slabs and went with more gravel and dirt. This is to show the state of ruin things become when a Plague infestation occurs.
Here are the Stage 3A's and specialists. The only converting here is one of the Stage 3A's was converted to carrying a grenade launcher from a bit I had. There was also another Stage 3A model that I converted into something else, which you will see. And of course the hounds. As you can see the concrete gets more sparse.
And the real reason I started collecting a Plague force. These are some of the zombies I used in our Zone Mortalis campaign my brother, Jarom, and I did a couple months ago. They acted as the native denizens of the space hulk that the kill-teams had to occasionally encounter. It was a fun campaign and it only worked out that these are made from a Mantic zombies kit, and Plague forces can take Zombies as well, which a Zombie themed force actually turns out to be pretty competitive.
This is the last part of my Plague force. One of the Leader options for plague is a Stage 3 general. I took one of the regular Stage 3A models and added a Tempestus Scion character coat, and a beret from one of the heads. This gives him a very 'general' look. I can't wait to get this guy painted, one day.

Well that should be it for my Deadzone forces. I currently have 4, which is enough to give demos and give players options.

Thursday, May 19, 2016

Gorkamorka - Gorker Mob WIP

So Miniwargaming, a favorite YouTube channel, is doing their own Gorkamorka campaign, and it has gotten my brother and I pretty stoked about our future campaign plans. They are doing a modified rules set to get some of it updated, which I am enjoying. Some of the original gorkamorka rules have the really oldschool feeling about them, which can be kind of wonky. So we have been getting our mobs built up, and this is what I have so far:

DA 'ARD 'EADS
Left to right: Boy with shoota, Nob Ugthug with 'uge choppa, and a bike with its spanner
Da 'Ard 'Eads are a mob of Gorkers (those who worship Gork over Mork) and are lead by a brutal but cunning ork named Nob Ugthug. He pays a special reverence to heavy armour and helmets. Any boyz that want to be part of his mob must wear their helmets when out raiding in da skid, and as they grow up and become bigger, they get heavier armour. Generally the boyz in my mob are made from the fantasy black orc/'Ardboys kit, mixed with bits from various sources and Nobz. This way I could get the appropriate 40k ork bits with the brutal heavy armour look of the fantasy models. The bike on the right was a challenge to build as I didn't have a biker boy body to ride on it, instead I had to modify one of the fantasy ork bodies to sit on the bike properly. I think it looks convincing enough. Also a big difference between Gorkamorka and 40k are the way vehicles work. Bikes can technically carry models as a transport. I see using this model to zip up and snatch scrap or just deliver hurt from whatever is sitting in the rollcage back there.
Left to right: Yoof with slugga and shield, Boy with shoota, and Yoof with choppa and shield
I have a few Yoofs (teenage orks) in here and they will be represented by regular boyz models, as they have not earned their heavier armour yet. When they upgrade, I will be moving the helmets and gear to the fantasy models to show how they've grown. All that remains to build for this army is a Trukk and its driver/spanner, and I have plans for that.

Monday, May 16, 2016

The Coven of Verminlord Skrax - WIP Haemonculi

Since I got my Deadzone kickstarter, I finally have the last 2 models I need to finish building my Haemonculus Covens army. This army has been in the plans for quite some time. I was planning the conversions about the time I did the backing. It was a couple of the minis they showed on the rewards page that solidified what kind of army I wanted to do. The original beginning idea for the army I already outlined here.
First off is the second Haemonculus in my army. This will be Venomlord Stich, the second of Verminlord Skrax' lieutenants. This one will follow the theme of my Wracks, as shown with the larger whip coil on his arm. Again, keeping with the WYSIWYG ranged weapons, he is holding a splinter pistol gangsta style in his left hand. The model is the Piper, a Kickstarter exclusive miniature for Deadzone 2.0. The part I love about him is his foot is propped on a pipe coming out of the ground with a swarm of rats pouring out. Very apt, I think.
And finally we have the master Haemonculus himself, Verminlord Skrax. I have a complete origin story for him, which I will provide on a later date. I have an arrangement with my brother, Jarom, to illustrate a short comic I wrote telling the story of Lord Sigcourax and his transformation. When that gets done I will post it here. In an exchange I will be painting 30+ Stormboys for his army. The base model for this is the Brood Mother, another miniature from the Deadzone Kickstarter. When I saw this mini I knew it had to become the final vessel for my warlord, an especially imposing rat. I mounted the usual WYSIWYG splinter pistol on his left arm and replaced the staff tip with that of a warpstone, similar to what I did for Warplord Tich. The mini is actually pretty large for a 25mm base, so I did the piece of scrap he is standing on, and careful not to completely cover the base for measuring. I was about to mount him on a 32mm base, but at a tournament it could be argued that it is not a legal conversion, because all official Haemonculus models are on 25mm bases.

The good news is my entire 1850 pt Haemonculus Covens is completely built. Now just to get it all painted in time for the tournament, as well as complete my display board.

Friday, May 13, 2016

The Coven of Verminlord Skrax - Painted Models Part 2

This is the rest of the wracks I have built. That will mark 20 wracks. 2 of these have special weapons (one with an Ossefactor and the other with a Liquifier Gun). My army is going to have only three 5-man squads of wracks, but I had the additional 5 built so I thought I'd get them painted while I was in the process. It would have been easier than trying to duplicate the process later.
And what's next on the painting block, the Grotesques. I'll do an update when they get done.

Tuesday, May 10, 2016

Censers & Tocsins - Putrid Blightkings and Nurgle Chaos Warriors WIP

In my goals for 2016 I mentioned an Age of Sigmar project I had planned, based on one of my $200 army ideas. I knew for a long time that if I ever did want to dabble in Chaos, I would go the Nurgle route, finding that particular god to be the most interesting. With the wonderfully loose army building rules for AoS, I can build a very characterful flavored Nurgle army.

Ultimately the goal is a Skaven Pestilens and Nurgle Rotbringers allied force. So some of my Christmas money started with the Nurgle Rotbringers and I got all the following built while it was still too cold to paint.
I absolutely love the Putrid Blightkings kit. It was a pleasure to put together. It had so many weapon and bits options, and even better, so many leftover bits! It made 5 Blightkings, but I kept one out to use for another conversion project I have planned. Luckily the Lord of Plagues kit fits in well with the rest of the Blightkings so he will be just another one of the boys.
Champion, Horn Blower, Standard Bearer
Then I saw some inspiration from someone else who made some Chaos Warriors out of the AoS box set Blood Warriors. Seeing how I have so many extra Blightking bits, I liked the idea. So here I have 10 chaos warriors with the mark of Nurgle. I just had to make sure to scrape off any Khorne iconography, and drill some holes in the armour to make corrosion, and Liquid Greenstuff makes for good goopy dirtying, you can hardly tell these were once devout worshipers of the blood god. I used just about every single extra Blightkings bit on these guys and I can't wait to paint them... one day.

Saturday, May 7, 2016

Zone Mortalis Tiles Project - Painting Progress

I have been slowly working on painting all 18 of those monstrous but really cool tiles. This is a little update so you can get the idea of what I am going for with the colors and style.
4 year old for scale.
I still have a ways to go, some washes and more colors. Also I need to paint up the door pieces, of which I am thinking of a military green. When I played a few games in these with my brother, and everything was grey painted, we found it difficult to pick out the doors in it all. So only the doors had to be a different color than the rest of the floors or walls.

Wednesday, May 4, 2016

Verminlord Skrax' Lair - Display Board Progress

Just a little progress shot on my display board. What's next to do is decorate it with texture and some bits before the painting.

Sunday, May 1, 2016

Deadzone - Thor Pattern Iron Ancestor - How I did it

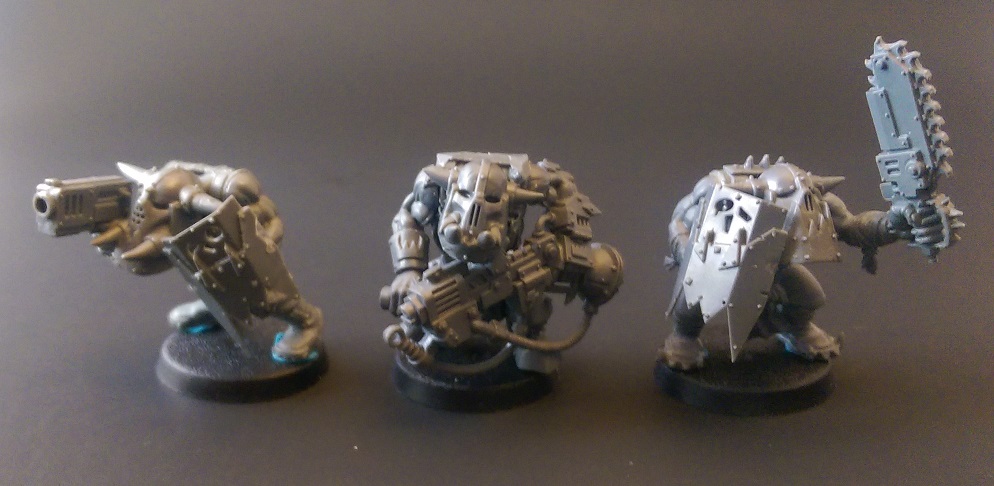
In the Forgefathers list for Deadzone, a unit they have is the Thor Pattern Iron Ancestor, unfortunately there is no official model for it yet. Well the idea of them intrigued me, a melee oriented Dwarf dreadnought. The Thor Pattern Iron Ancestors are like the regular Iron Ancestor, but a little faster (actually can do a run move) and replaces any possible guns with 2 forge hammers. The additional bonus of wielding 2 hammers is better chance of hitting in melee.

Time will tell if this unit is even worth it as it is THE most expensive model (points wise) you can get for the game, and Forgefather models are already all generally more expensive. One of the challenges of playing Forgefathers I've found is you are usually outnumbered. These will have the infamous Iron Ancestor toughness to take down, but will it be worth it?

I really don't care. I wanted to make a big melee dwarf dreadnought and set about finding some ways to go about it. I saw a simple conversion another guy did with just taking a regular Iron Ancestor and giving it 2 hammers. Well I really didn't like the look of that and wanted to go for something a little more unique. So I stumbled upon Mantic's Dreadball Giant Iron Ancestor, and I got an idea. I liked the different look of the Dreadball one (like the neat little head wings) and the fact that it had 2 fists. Two fists that could be gripping something. Well I am a sucker for big 2 handed great hammers so I got the idea finalized in my head and ordered the model.
The model came pre-assembled like this, but luckily it is made of a softer pvc material, so cutting this up shouldn't be too hard. I am just grateful it's not metal.
Like a lot of my big conversions and reposing, it starts with cutting it up a bunch. This is no exception. The arms are going to need to be reposed to double grip a great forge hammer.
The big hands will be reposed as well. So they needed to be cut off.
Starting with the left hand, I cut off the cable and pins, and thumb. The thumb will be repositioned to grip the hammer. The other 2 digits I left intact because they will be holding the hammer from underneath and didn't need to be enclosed around it.
On the right hand, luckily the fingers are turned inward some, so they will be gripping the haft. The thumb was removed as well to create a more realistic hold.
The first thing I reassembled was the right hand gripping the hammer's bar. For the bar I am using a pole from an Ogor standard bearer. It seemed to be just the right thickness for what I needed. As you can see the fingers were already turned inward to wrap around the pole, and I glued the thumb back on, but in a better gripping position. With this now held, I can start posing the rest of the model around it.
Pinning will be used a lot in the reposing of this model, but I was careful to not glue any of the pins in place so I could finalize the positioning first. The right hand with pole is to be pinned on the right shoulder unit.
With pinning (again, no glue) I could get an idea how this guy was to hold the hammer. I wanted the hammer head to be slightly elevated to create a realistic pose.
I pinned the left arm and hand into place and finalized the overall pose. Notice I have not glued the left thumb in yet because I didn't want it to get in the way of gluing the pieces one at a time as this was going to need to be reassembled during gluing.
Using the above pose I could finally see what pose the right arm and hand needed to be in. So after gluing the pins in place, I had to create the cable and pins for that arm. Due to the angle being more extreme than before, the original pin and cable pieces were not long enough, so I made some new ones out of plasticard tubes you can get from Gale Force Nine. I got the variety pack a while ago at a game shop and it is being used on several of my projects.
I didn't get a shot of it, but I glued in place the right arm and hand holding the pole, so all I had to do with the left was glue it in place to where it rested under the pole. Now I was able to glue on the left thumb. The place it mounted on the hand was a little awkward so I cut out a tiny piece of plasticard to blend it with the hand. Everything so far has been glued in place.
Now that the hard part is over (getting the hold position complete), I am able to get to the embellishments. Like with the left arm, the right arm needed a new cable piece that I made out of plastic tubing.
With the pole and pose glued in final position, I noticed it was a little too bland, so I blinged it up slightly with some spare bits I had from an old Warpath Steel Warriors kit and some plasticard. Also on the right hand, the green stuff is filling in the hole on the back of the hand. I am pretty sure that was designed for this model being a dreadball figure so it could catch the ball, but this guy won't be playing dreadball on the battlefield. Now all that is left to be done is add the hammerhead! I was a little nervous at this point because I didn't actually have the head I was going to use in yet. I was still waiting for it to be delivered from Ebay.
After a week the hammer head finally arrived. It is an actual iron ancestor hammer head. It's just stuck in place with sticky tac to see if the look would work, and I got the feeling that it was a little too small. The hammer head was meant to be wielded one handed, so I will be bulking it up to look the part of a 2 handed weapon.
I started off by chopping it up into 3 separate pieces as shown, being careful to keep the cutting clean and inside the seems.
Then I measured out and cut out of thick plasticard some blocks. These are each 2 pieces thick of the plasticard.
It is then glued together and sanded even. I then bored a hole right through the center of it so it can mount strong on the pole.
Now this is more like it. I marked off on the pole where it stuck through and cut it down.
To cover the pole's end, I put on a small shield piece from some of my fantasy dwarf bits.
I pinned it on a 50mm base decorated to the street rubble theme and it's done! The only thing I didn't cover was a simple little dwarf face symbol I stuck in a hole in its back from my fantasy dwarf bits.

So I present to you Dunhill the Indomitable. I am super proud of this conversion and think it came together really nicely. I would love to get to painting all my Forgefathers and Enforcers, but I do have deadlines for my Zone Mortalis Tiles and Haemonculus Covens army right now.