If you have been following me for a while, you would know I actually really like Reaper's BONES line of minis. They are cheap, there's a huge variety, and have a decent amount of detail, but there are problems with them, namely the soft plastic they are made of. But I don't fret over that as with a little creative hobbying, you can get around the flaws. So here are some tips I have found for preparing BONES minis for tabletop.
TIP 1) Replace Bendy Bits
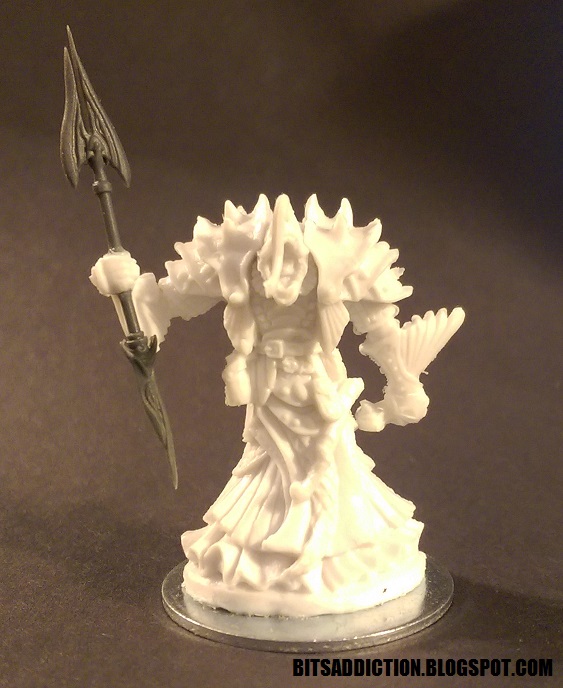
A common complain are the bendy and warped weapons. Some guides will tell you to stick them in hot water, bend it back, and let it cool. But for me, don't be afraid to replace them with whatever bits you got. Superglue works best for this as plastic glues don't work on BONES materials.
In this case I simply chopped off the spear bits, drilled holes in the hands, and fed in this bit from the Drukhari Venom kit. Common fantasy orcs are different than the 40k Orks are some of us used to. A spear with skulls on it seemed to fit.
TIP 2) Base them on Washers
BONES minis are made of a very light weight material, and have little bases built into them already, but they are rarely big enough and for especially tall minis they are prone to tipping. So put them on something cheap and weighty. Put them on washers.
I got these at a local Home Depot. When looking for good washers, you want ones with the right size on the outside and as small a hole inside as possible. The washers also don't need to be especially thick. I got these ones because I can use them for 25mm, 32mm, and 40mm bases respectively.
For gluing them on, I would recommend E6000 or GOOP. You can get either at any hobby story and they are essentially the same things. They are very strong but have a long set time and cant do detail gluing very well. But it is great for gluing BONES to washers. Hot glue isn't strong enough and doesnt glue to metal very well, and superglue is too brittle. E6000 does great with metal.
This gives us a decent amount of weight on the bases and holds them upright fairly well for cheap. Again, E6000 works great on metal, so even one of my old Reaper metal minis has a nice stable base now. But what about the leaning model syndrome?
TIP 3) Prop them up with Paperclips
Some models have weak ankles. Literally. They lean forward too far or back too far. Again others will tell you just to put them in hot water then correct them, but I found the strongest solution is to use the same stuff I pin models with. Paperclips.
When painted up in a flat black, the pins should be fairly invisible.
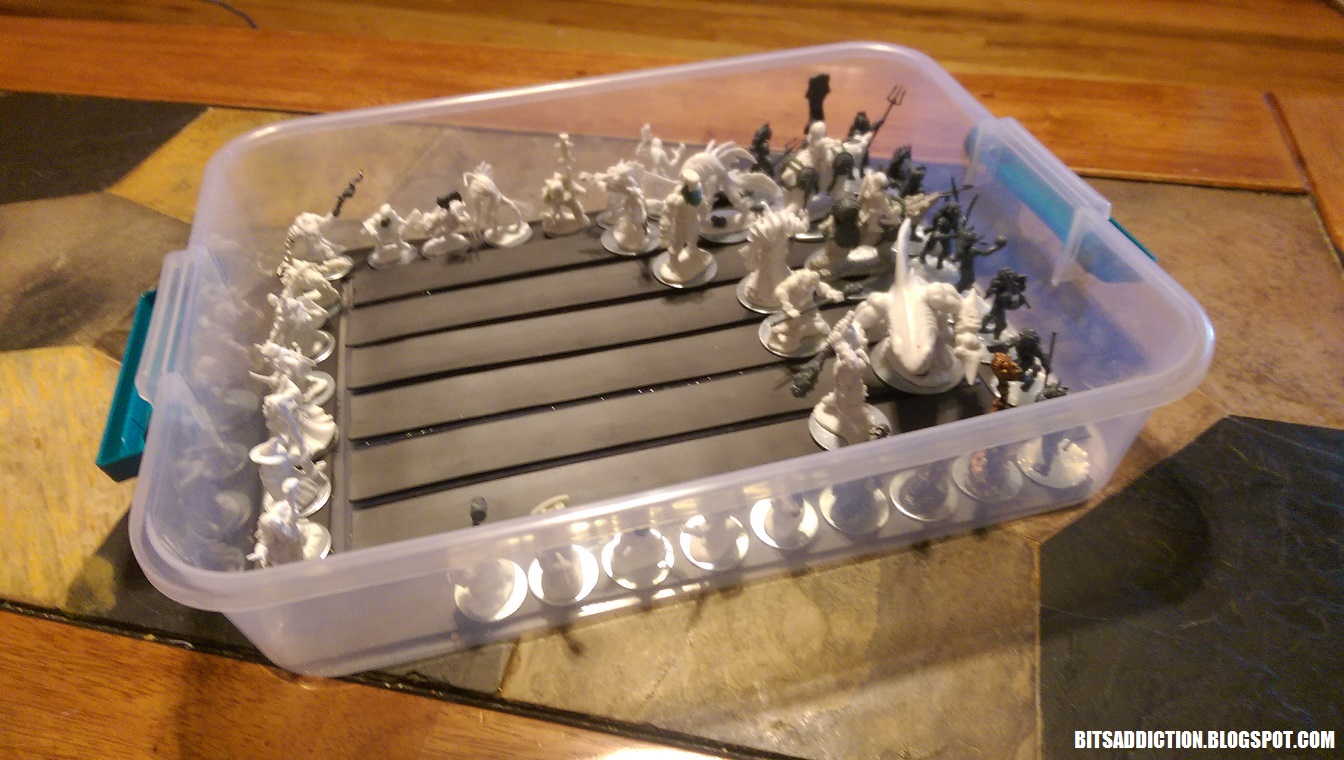
TIP 4) Transport them on Magnets
With metal washer bases and light plastic minis, they have a very good advantage with magnets and transportation. I found a cheap plastic container with lid at my Walmart. I wanted something about 3" deep, so it could hold my bigger bones minis.
Next I got this magnetic tape. I hear you can buy sheets of this stuff instead of the tape, which may have been better. Crafters usually use this to make refrigerator magnets.
Line the bottom of the container with the magnetic tape. I found the sticky material on the back of the stuff to be incredibly weak, so I just glued the strips down with the ultra strong E6000.
And now you have a decently stable carrying case for your minis without having to bother with foam trays or liners. Granted the magnets are not strong enough to hold the minis when they are really shooken around or bumped upside down, but for normal jostling and transportation, it's definitely good enough.
Showing posts with label miniatures case. Show all posts
Friday, July 28, 2017
Tuesday, January 17, 2017
LVO Army Transportation
I have to take my army on a plane. And there is no way I am checking that piece of luggage! So I found for cheap a piece of carry-on luggage, with the sole purpose of being my army carrier.
With some cardboard cutting and hotglue-ing, I have made a couple sectioned model trays. I may line some of them with some thin foam material for extra safety, but this should ensure my models fit securely in the overhead compartment! Hopefully.
Only 2 trays deep. The Prosecutors are turning out to be very problematic for space, but definitely more manageable with the wings conversion I did to them.
Sunday, March 15, 2015
Decorated Miniatures Case (How I did it)
This will be a simple little article detailing a quick and easy way I discovered to making a decorative miniatures case. A lot of time you can get Plano gun cases with pluck foam that hold minis just fine and at an affordable price. If you want to add a bit of flair to those plain black cases, read on.
This is a minis case I got from the Reaper BONES kickstarter.
To start off I put a layer of thick painter's tape on the area I wish to decorate. Then I drew (pencil, pen, marker, it doesn't matter) an outline square showing the boundaries for the emblem I will be making. I wanted things to be fairly centered in the face of the case.
Next using whatever methods you know (be it freehand, rulers, etc) draw the design you want on the case. Make sure it is clear to you the outline you are final with. As you can see I did the initial drawings and areas with pencil, and went over the final markings with marker to easily distinguish them without having to go through and erase the pencil.
Using a hobby knife, I cut out the area I wanted to be painted. Think of this as making a stencil, but because it is already taped to the case you don't have to worry about any free floating pieces or transferring it over.
Prepare the area around the case for painting. I am using spray paints because I wanted a nice even coating without brush strokes. Since spray paints spread, I made sure to cover any area I didn't want any to get on.
Simply paint the area, and when it's dry remove all the tape. Easy.
I can totally see this method being repeated for additional details with other colors. I also spray coated dullcoat just to give it some extra protection against wear.
Subscribe to:
Posts (Atom)